
How We Reshank Rings: A Peek Behind the Bench
Rings are able to live a full life; however, years of wear, resizing, and daily bumps can often thin out the bottom portion of the band known as the shank. When that metal becomes too thin or worn to safely support the rest of the ring, a reshank is the best way to restore strength, comfort, and longevity. Here’s a look at how we reshank rings in the studio, step by step.
When It’s Time to Reshank a Ring
There are a few signs that your ring is ready (or overdue) for a reshank:
The back of the ring is under ~1mm thick — especially if it’s a ring you wear every day. At that point, the metal may be too thin to hold its shape safely.
You need to resize the ring up, but the shank is already thin. Stretching or cutting into compromised metal can cause it to crack or fold.
You notice small cracks, deep grooves, or warping. Even slight distortions can indicate metal fatigue and mean the ring is at risk of breaking.
Catching these signs early prevents more serious damage and keeps the rest of the ring—especially the stones—secure.
Why It’s Important to Reshank a Thin Ring
A thinning shank may seem harmless at first, but it’s one of the most common causes of major ring damage. When the band gets too thin:
It can bend or warp easily, throwing the entire ring out of shape.
The top of the ring becomes more vulnerable, especially if it holds diamonds or gemstones. A bent shank can loosen prongs and settings.
Cracking becomes more likely, especially in gold alloys that have been worn down over many years.
Sizing becomes risky, because manipulating a weak shank can make existing damage worse.
A reshank reinforces the structure of the entire ring, protects your stones, and ensures the piece can be worn safely for decades to come. It’s one of the best preventative repairs you can do—and typically far less costly than repairing a ring that’s already snapped or warped.
Assessing the Ring
Every reshank begins with a close inspection. We check the thickness of the existing shank, looking for areas that are too thin, cracked, or worn flat. We also review the overall design and consider if the ring needs to go up or down in size—this helps us decide how much new material to add and where the piece should be opened.
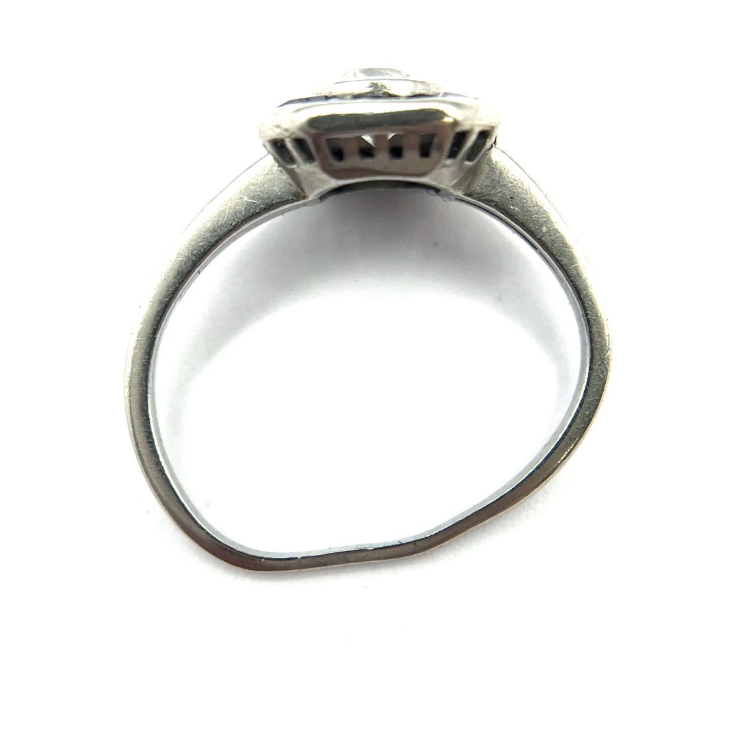
Before Ring Reshank
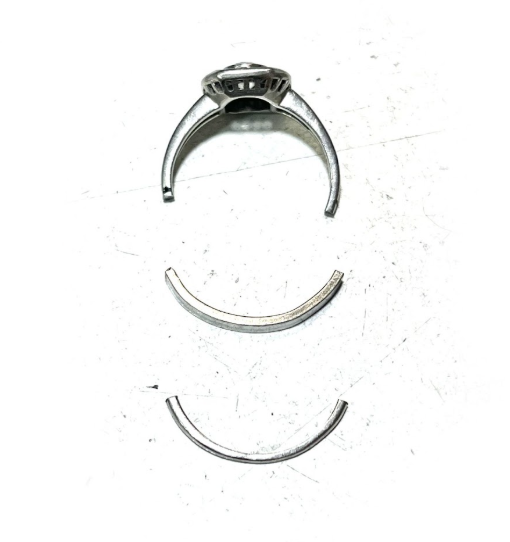
Determining Where to Cut
Once we understand the condition of the ring, we choose the ideal spot to remove the worn metal. Most of the time, this is at about 3 o’clock and 9 o’clock, which results in removing about half the shank. In addition, we also consider structural needs, existing sizing seams, and how well the new metal will blend in.
Selecting and Ordering New Ring Stock
Next, we choose the appropriate type and size of replacement metal, known as ring stock. This matches the original alloy—yellow gold, white gold, platinum, etc.—and is selected in the correct thickness and width for the design. If we don’t have the perfect fit in-house, we order the exact stock needed to ensure strength and aesthetic consistency.
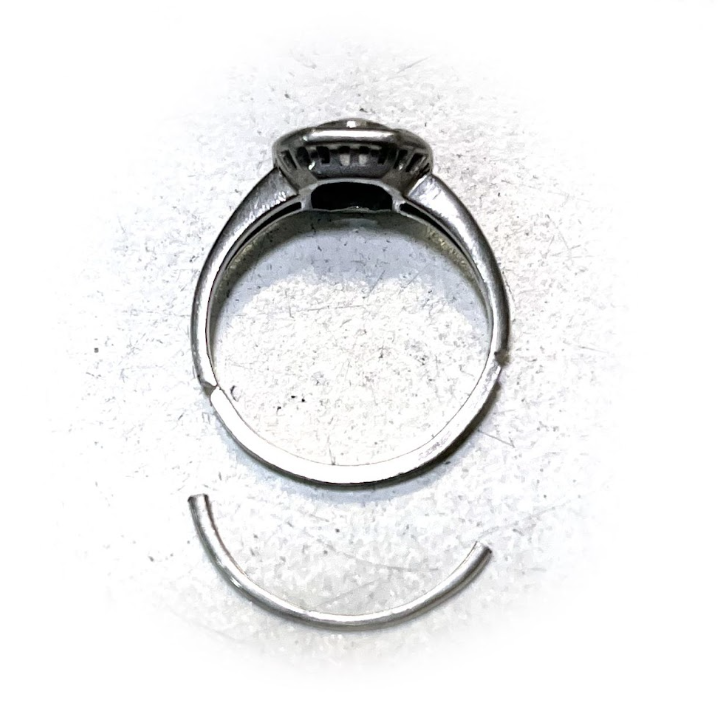
Forming the New Shank
Once the new metal arrives, we bend and shape it into a curve that matches the ring’s original profile. This takes careful forming to make sure it lines up perfectly with the existing sides of the ring.
Forming the New Shank
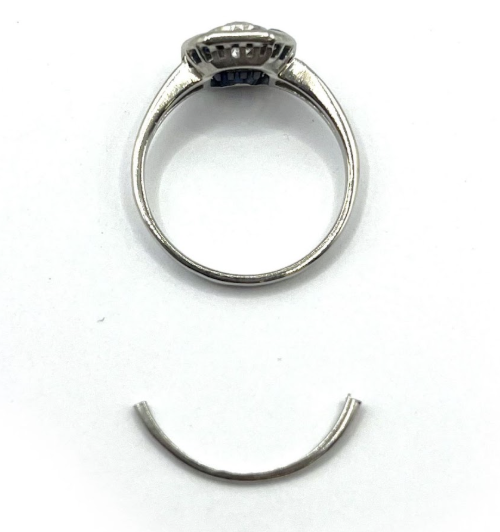
Welding or Soldering the New Section In
With everything aligned, we remove the old shank portion and attach the new metal using either soldering or laser welding, depending on the type of metal, thickness, and surrounding stones. This creates a clean, strong bond that will last for decades of wear.
Attaching the New Shank
Checking and Perfecting the Size
After the new shank is attached, we round up the ring on a mandrel and confirm the size. Small adjustments are made here to ensure the new shank sits perfectly and the ring matches the client’s requested fit.
Blending and Polishing
This is where the reshank really becomes one with the original design. We file, smooth, and blend the seams until the transition between old and new metal is completely invisible. Then we give the entire ring a full polish to restore shine and remove any surface marks created during the process.
Finished Ring Reshank
Final Structural Check
Before the ring leaves the bench, we do a full inspection. We check that all stones are tight, prongs are secure, and the ring is strong and comfortable. The goal is to return a piece that not only looks beautiful but is fully reinforced for daily wear.
Visit Us for a Reshank or Assessment
If you’re unsure on whether your ring needs a reshank, we’re always happy to take a look. You can bring your ring into our Capitol Hill studio anytime during business hours for a quick assessment. We’ll measure the thickness, check for stress points, evaluate stone security, and walk you through your options.
Whether it’s a beloved daily-wear wedding band or a vintage heirloom that needs some TLC, we’ll help you decide the safest, smartest next step—and make the repair as seamless as possible.

Hey there, I’m Nina!
I’m a Seattle-based jeweler specializing in custom designs, heirloom restorations, and thoughtful repairs, all done by hand, start to finish, right here in my studio. Every piece I work on carries a story, and I take pride in preserving that story through craftsmanship, care, and attention to detail.
Whether you’re dreaming up a one-of-a-kind creation, bringing new life to a family treasure, or simply fixing a favorite everyday piece, my goal is to make the experience personal, collaborative, and meaningful.
If you have an idea, or even just a feeling, about what you want, let’s bring it to life together.